11 tips to make better photographs
Pinball machines are grateful subjects to take pictures of. They have nice looking artwork bright colors, lots of lamps, .. Overview pictures as well as closeups can give excellent results. The possibilities are endless for a photographer with inspiration.
Quality photos are always useful. Maybe you don't intend to hang them as decoration of your gameroom, but if you want to sell a machine and place an ad online, good looking pictures can make a huge difference in the number of reactions you'll get.
Many people think you need an expensive camera (dslr) to be able to make nice pictures of pinball machines. This isn't true. With a compact camera you can get great results, if you keep a few things in mind. A compact camera has a advantage that you're able to position it somewhere on the playfield where there's no space for a large camera.
These tips are based on my large article about pinball machine photography,
and have been published in Spinner, the magazine of the
Dutch Pinball Organisation.
1. Think about what picture you want to take
The difference between a snapshot and a photograph, is that for the latter there's been some thought about how it should look like. Look well, try to form yourself an image what you want (and don't want) to show on the picture, before you press the shutter button. What is the main subject, what atmosphere, what will the picture be used for ? How light, dark, .. Don't just press the button and hope the result will be good.
2. Read the manual of your camera
Chances are small you'll get excellent results if you only use your camera on full automatic settings. You don't have to start a photography course, but some basic knowledge is required. Read your manual and get to know your equipment. Know what's possible, what are its limitations. At least try to know how you set these things: flash on/off, macro mode, white balance, selftime, exposure time/diafragm (if possible).
3. Watch your composition
Horizontal stays horizontal. Try to keep your camera straight and perpendicular with the subject, especially when photographing backglasses. If you rotate the camera up or down, the edges will divert.
Don't cut a part of your subject, keep the whole part in the picture. Try to achieve a perfect symmetry where possible. A picture taken behind the flippers should be from exactly between the two flippers. A small change will look not right.
4. Clean your pinball playfield
Megapixel cameras have such high resolutions that every detail becomes visible. Clean your playfield very well, replace dirty rubbers with new ones, check if every lightbulb works. A new layer of wax on your playfield gives more reflections and hides small scratches. Poets je kast grondig, vervang vuile rubbers door mooie witte, kijk na of elk lampje werkt. Clean the playfield glass or remove it (and put the lockdown bar back in position).
5. Switch off the built in flash and add additional lights
Light is one of the most important factors with photography. You almost never get nice pictures when you use the built-in flash. Bright colors become visible when you take your playfield outside on a sunny day. Inside or on rainy days you'll have to add additional lights.
check if you can disable the built-in flash and extend exposure time. Add halogen work lights on both sides of the playfield (let them bounce on the (white) ceiling, or hang white sheets. This will remove unwanted reflections from the rest of your gameroom.
If you add less light then the playfield lights themselves become more bright, but details in the artwork disappear. Extra light is almost always required, a picture of a pinball machine in total dark only shows a few brightly lit inserts.
Photograph backglasses within the machine. Add light from the side to show all details. A trick which works well on translights (also on backglasses, but be careful) is to tape them with some clear tape against a large window. This will evenly lit everything and bring out all details.
Experiment, the results you can get depend on what settings are available on your camera and what you add of additional lights.
6. Use a tripod and self-timer
When you take pictures without flash, the camera will chose for a much longer exposure time.
Any movement will make the picture unsharp. A tripod is the solution.
If you don't have one, put the camera on a stable platform such as a stack of books.
But tripods can be
bought cheap so there's no reason not to use one.
Use the self-timer so you don't introduce movement by pressing the shutter button.
7. Use macro mode
By default cameras can't focus on something closer than 1 or 2 meter.
If you want to make close-ups, you have to set this. Activate the macro mode, usually this is represented
by a flower icon. This allows the camera to focus much closer, some cameras even have a super-macro mode
that allows to focus on something as close as 1 inch.
Read your manual and know what the minimum focus distances are. They may change depending on how much
you zoom in. Usually you need to set macro mode for every picture you take of playfield parts.
In macro mode it's also possible to make the background out-of-focus with a compact camera.
Portrait presets may also do this (in a lesser degree).
If you want to have the complete playfield sharp,
try the landscape preset. If you can set the diafragm manually, use a small one (large f-number)
as this will also increase the part that's sharp. A large f-number will also cause nice stars
around lightbulbs.
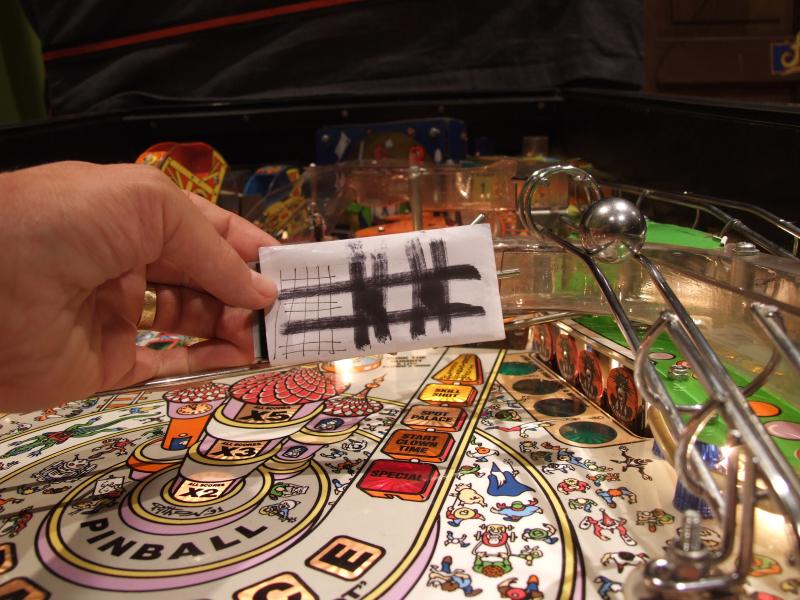
8. Use a focus card
Camera focus by default on what's in the middle of their sensor.
If you want to make creative pictures, you often want to focus on something that's not in the middle.
Therefor you can use a focusing card.
This is just a piece of paper on which you draw some black lines (focus system like sharp contrast).
Put it in the center of the picture at the distance where you want to have sharpness (like the
pinball on the right). Half-press the shutter button so the camera focuses. Remove the card and press
further to take the picture..
If you want to look like a professional photographer you can even
buy a focus screen.

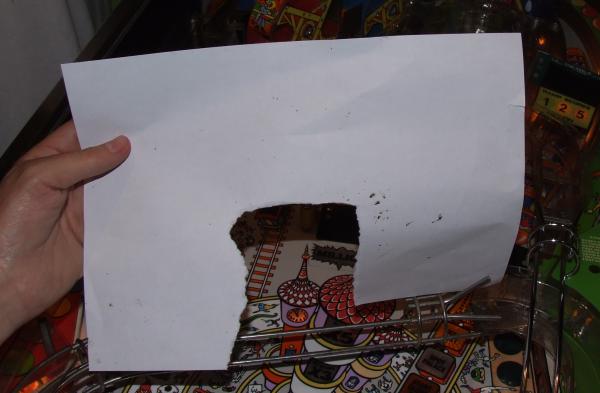
9. Use a flash diffuser
If you make close-up pictures with the built-in flash, you'll often notice large contrasts.
You may have white burnt out spots where the flash reflects, and you get dark shadows with sharp edges.
There's a trick to make the light much smoother: take a piece of paper and hold it a few inch in front of
the flash. It will diffuse the light so you get less noticeable shadows.

10. Restrict reflections
The main problem when taking pictures are all reflecting surfaces. There are two solutions to minimuze them: zoom in, and control what's being reflected.
When you zoom in from far away, the area that's being reflected become much smaller.
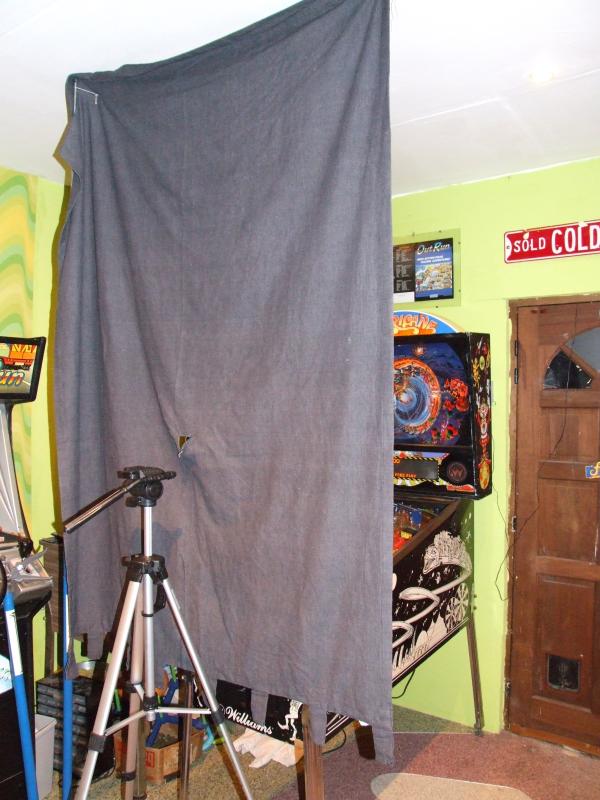
Then you can hide what's being reflected. In many pictures of a playfield you'll see the bright lights and score displays from the backbox. Hang a piece of dark cloth or cardboard in front of it.
If you want to take really professional looking pictures then you have to completely control what's being reflected. Hide your camera and yourself behind a piece of dark cloth in which you cut a hole for the camera lens. No more unwanted reflections in the backglass. On some mirrored backglasses a white sheet can give better effects than a black as it'll bring out the mirrored parts more.
Do the same when taking pictures of the playfield. Either darken the room, hang dark sheets around the machine, or hang white sheets which you light.

11. Photographing pinballs
Taking pictures of pinballs is even more difficult as they're spheres that totally reflect everything around. You'll have to do a special effort to hide the camera itself (zoom in from far away, use the built in flash to hide the camera in the white spotlight). Or remove the camera in photoshop..
Buy a new pinball and never play a game with it, use it only to take pictures off. EVen the smallest scratch will show and is disturbing. Don't forget to wipe off your fingerprints.
Stick it on the playfield with a piece of tape, magnets, .. Taking pictures of a pinball in movement is almost impossible, even if you get the timing right it'll usually show up as a grey blur. Most of the time you get the best results when you add the movenement later in Photoshop..
12. Make photographs
Extra tip: don't just store thousands of image files on your computer. You'll get much more satisfaction by making prints of your best pictures, so you can see them like they are meant to be, share and show them, ..
