
Add lamps to Hurricane's pop bumpers
Text and pictures by Mike Schudel
Back in 1995, the first pinball I ever had was Hurricane. I sold that game in 2001, but before I did I added lights to the pop bumpers. I never really thought that much about adding the lights since the sockets were there, but the wires were missing. I simply added the wires and then a few weeks later sold the game.
Fast forward to 2010, a coworker of my wife's has a game that was in dire need of shopping out. I said fine and he delivered his Hurricane. Now, this was the first time I had even seen a Hurricane since I sold mine. The funny thing I noticed is this game had no lights in the pop bumpers either. Upon further inspection, nothing was present. No lamps, no sockets and no wires. Since I had the parts lying around anyways, I thought it would be a nice touch to add them back in.
After talking with some people on rec.games.pinball, it seems like the pop bumper lighting was pulled from production early on. As it turns out there are some Hurricanes that have lighting in the pop bumpers, but most did not. Whether this was to save costs or if some sort or problem became apparent, most Hurricanes shipped minus the pop lighting.
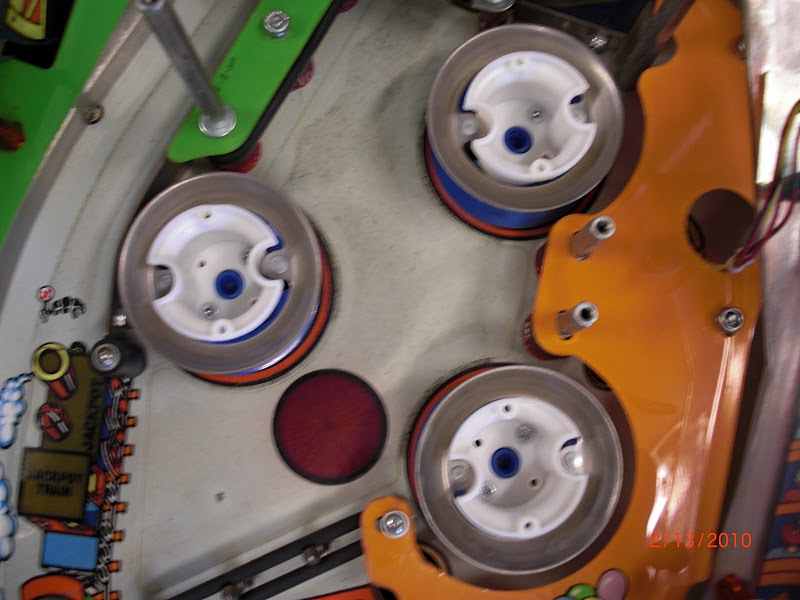
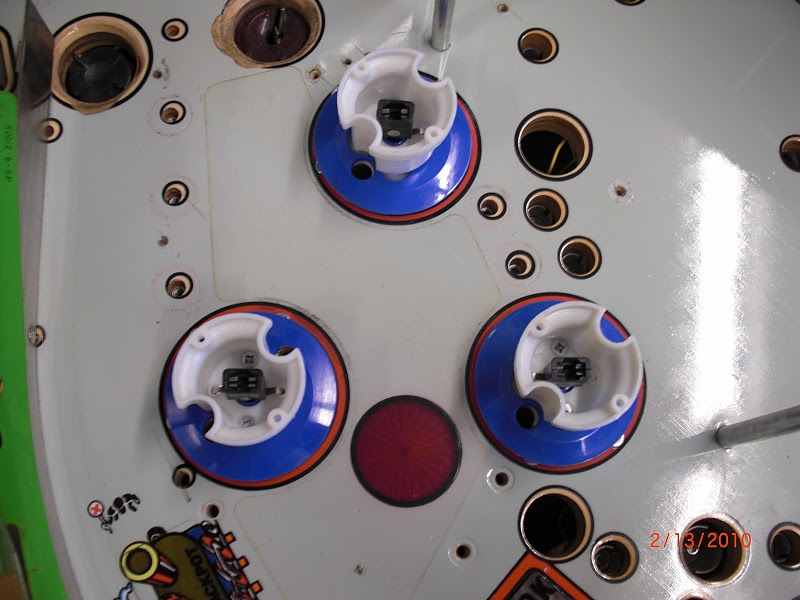
Most Hurricane pinball machines just don't have any sockets installed in the pop bumper bodies.
Now, there are two ways to approach lighting in the pop bumpers. One is to simply add them to the General Illumination (GI) string so that are lit constantly. Lots of games are this way and its fine. The other way is to add them to the lamp matrix, so that they blink on and off in pattern with other lamps in attract mode and during game play.
Luckily, a quick glance into the lamp matrix tables in the Hurricane manual shows that the pop bumpers were part of
the lamp matrix. They are lamps 65, 66 and 67 for Left, Right and Bottom jets respectively.
Now, just because they show up in the matrix, doesn't mean that the lamps are part of the matrix software schedule.
Things change in production and since the lamps were not added top the pop bumpers, there might be a chance they were
never programmed.
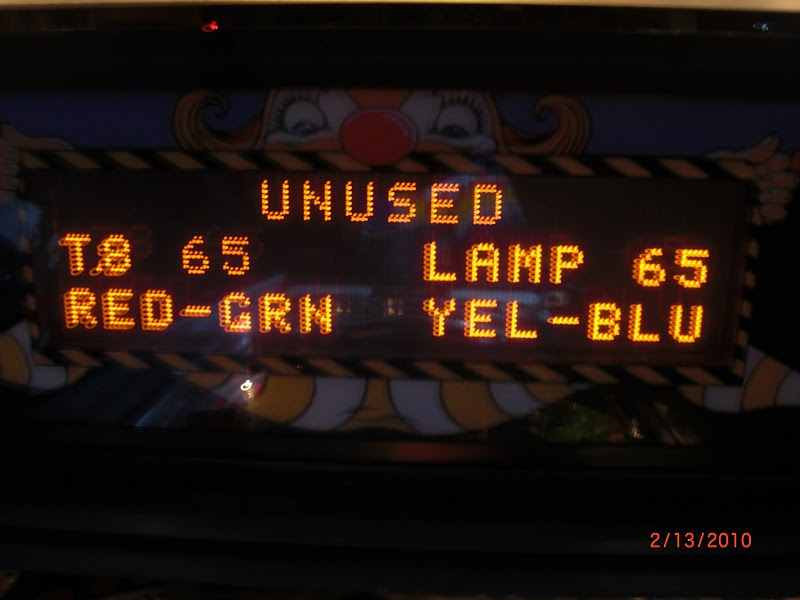
Going into diagnostic mode and choosing the first pop bumper 65, the diagnostics show that lamp as 'unused'. It still shows all the pertinent information for wire color, connectors, transistor drivers, fuses, etc.
Well, I decided to just go ahead and wire this up to the matrix. I know that the matrix is valid because of the game I did 15 years ago. Otherwise I would have tested by hooking a lamp up with temporary wire and alligator clips.
Once I got the area removed of all parts around the pop bumpers the pop bumpers were disassembled and the top of the playfield thoroughly cleaned. All the pop bumper parts on the top side of the playfield were cleaned and reinstalled. The pop rings were removed and the pop bumper brackets under the playfield were moved out of the way.
The materials I used were (3) pop bumper #555 wedge base lamp sockets with the flat wire leads. I used (3) #555 lamps, some short 1/8' clear vinyl tubing and (3) 1N4004 diodes since this is going into the lamp matrix. Had these lamps been connected to the GI circuit, diodes would not be necessary.

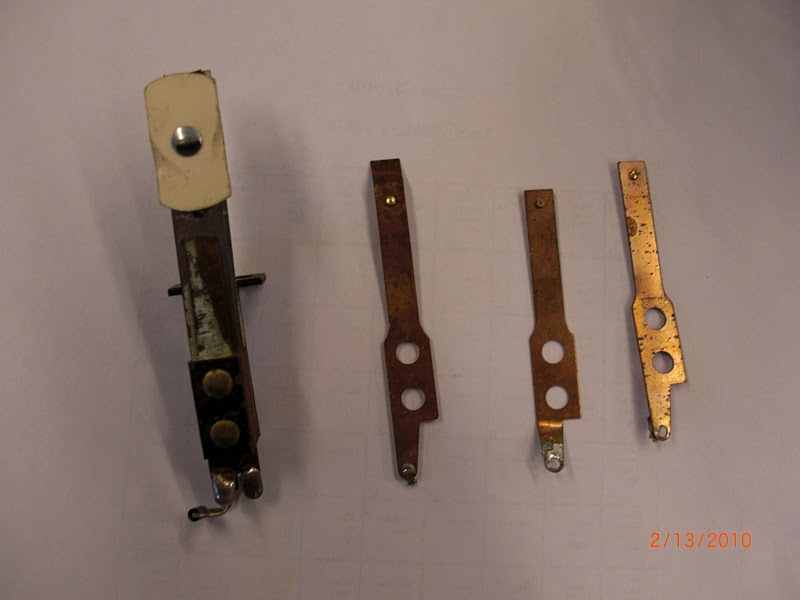
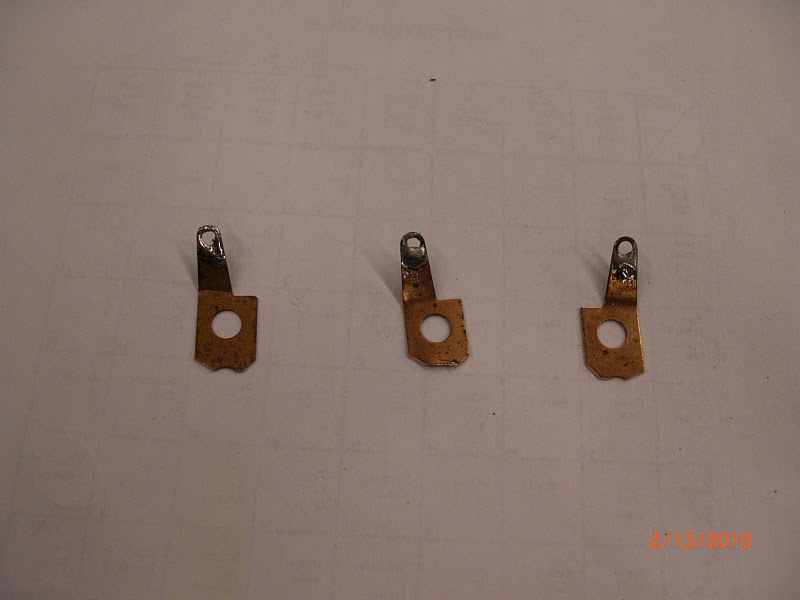
I also wanted to install these the way Williams would have and that is with some solder tabs mounted under the playfield to mount the diodes and wires. I never throw anything away when I shop games, so I made some solder tabs from old standup targets I had. I disassembled them and cut the ends off so there was one mounting hole (where the target was riveted) and the solder ear.
I inserted the lamp sockets into all three pops and stapled down the leads under the playfield. I added a small length of clear vinyl tubing (1-1/2' inches or 38mm) to the lead that will go under the pop bumper housing. Keep in mind where the other components are mounted under the playfield so that the bare metal leads are not being touched by any brackets.
Since all three pops are in the same column (column 6) of the lamp matrix, this makes it easy to just tie one lead from each pop together. And, since there are no diodes on the column wires of the lamp matrix this makes it nice to tie them together. So I ran the center leads of each pop bumper towards the center area of the pop bumpers. The leads are not quite long enough to reach each other; I used a solder tab I had made and a short length of wire to tie them together.
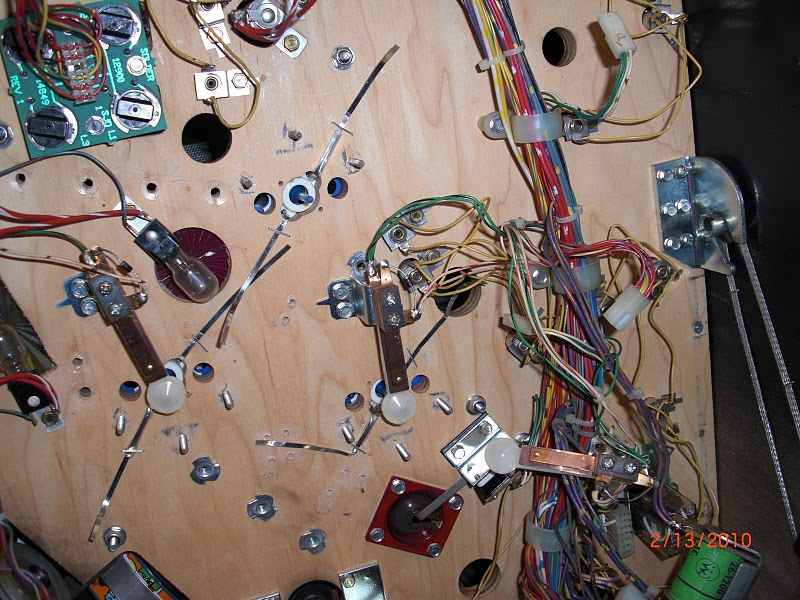
Underside of playfield showing lead routing. Note clear tubing.
Now the yellow/blue wire that is part of column 6, that ties the center of the pops together, I needed to find a place to tie into. Tying into lamps that are part of a PCB light assembly with IDC connectors is not going to be easy. Nor do I want to splice wires. So, I looked on the lamp matrix for a lamp in column 6 that is not part of a PCB assembly, but uses a single #44 lamp socket with solder tabs. The only lamp in that entire column was the 'Dunk the Dummy' light #68. So, now we need to go from the center point of the pop bumpers up to the yellow/blue wire on the Dunk the Dummy #68 lamp socket.
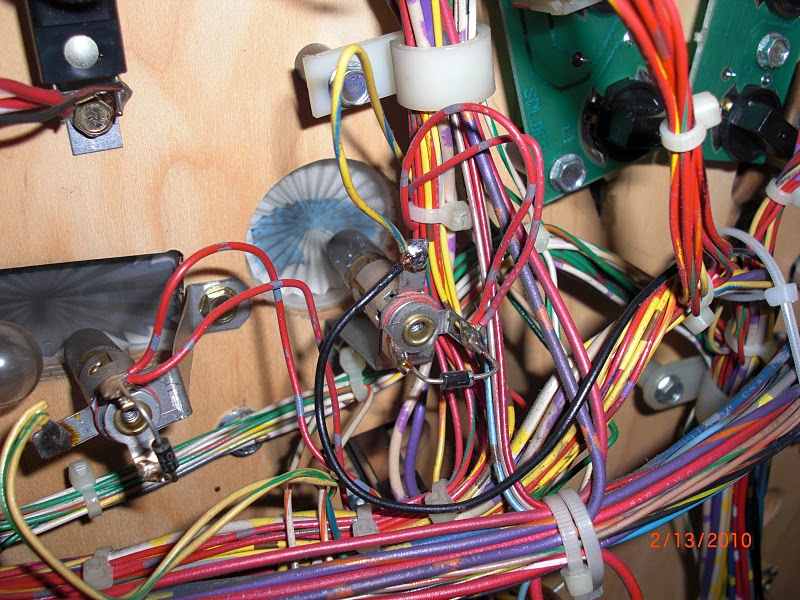
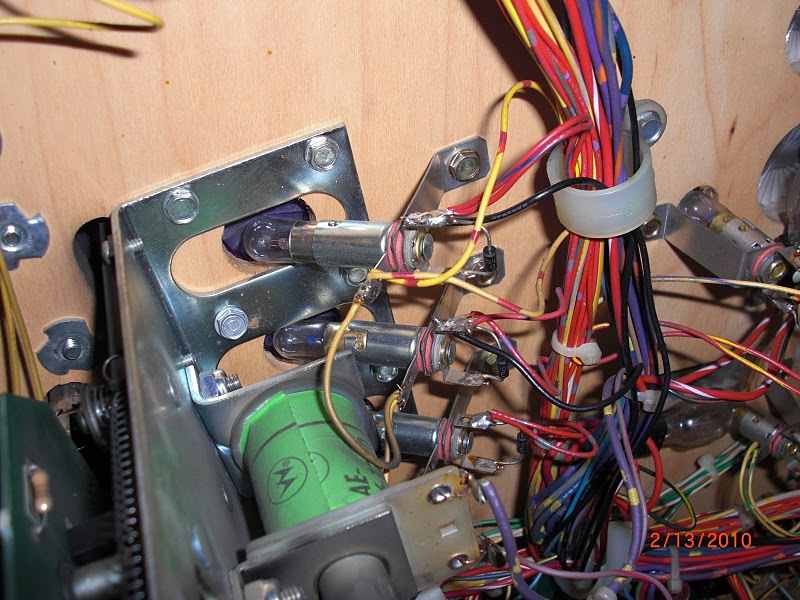
Black wire tied to the common wire to yellow/blue column 6 'Dunk the Dummy' lamp #68.
Now to wire the red wire side of each pop bumper to its respective row in the matrix, a diode needs to be added. The diode is oriented so that the unbanded side goes towards the lamp. So I soldered the unbanded end of the 1N4004 diode directly to the lamp socket wire lead. I mounted the solder tabs I had made earlier, under the playfield with short wood screws and soldered the banded end of the diode to the tab. There is plenty of room under the playfield to do this luckily.
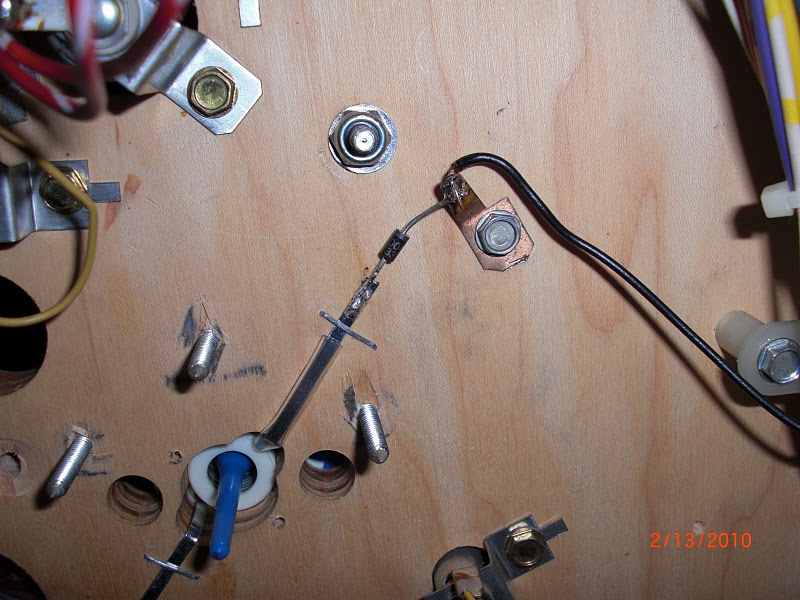
Close up of solder tab, diode and clear tubing under the playfield.
The procedure is the same for each pop bumper with the only difference being which row in the lamp matrix each pop bumper gets wired to. Again, I looked for a single #44 lamp socket under the playfield in rows 5, 6 and 7 for the Left, Right and Bottom jets respectively. Be careful when the playfield is raised, because the bottom jet is actually on the top !
For the LEFT jet bumper a great place to wire is the lamp #85 in the 'Left Return Lane' and connecting to
the red/green wire on that lamp socket. This wire will go to the left jet bumper banded side of the diode.
For the RIGHT jet bumper a great place to wire is the lamp #26 'Left Drop Target #1' and connecting to the
red/blue wire on that lamp socket. This wire will go to the right jet bumper banded side of the diode.
For the BOTTOM jet bumper a great place to wire is the lamp #27 'Left Drop Target #2' and connecting to
the red/violet wire on that lamp socket. This wire will go to the bottom jet bumper banded side of the diode.
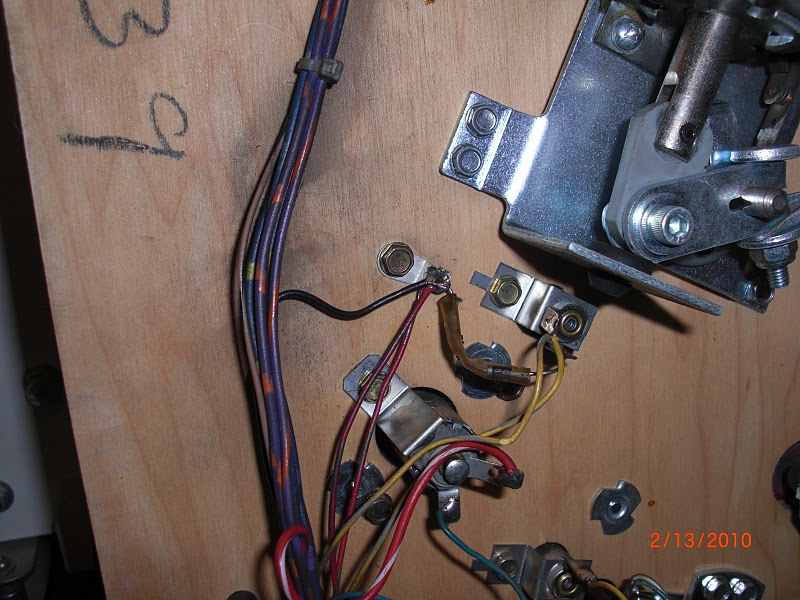
Black wire tied to the red/green row 5 'Left Flipper Lane' lamp #85.
Black wires tied to red/blue and red/violet rows 6 and 7 'Left Drop #1' and 'Left Drop #2' lamps #26 and #27 respectively.
Once all the wires are neatly dressed inside the wire harnesses and zip ties added, the game can be turned on with new #555 lamps in each pop bumper. I did not have any fancy colored wires, but had a huge spool of #18 wire in black that I used. So you can see in the pictures the wires that I added are black.
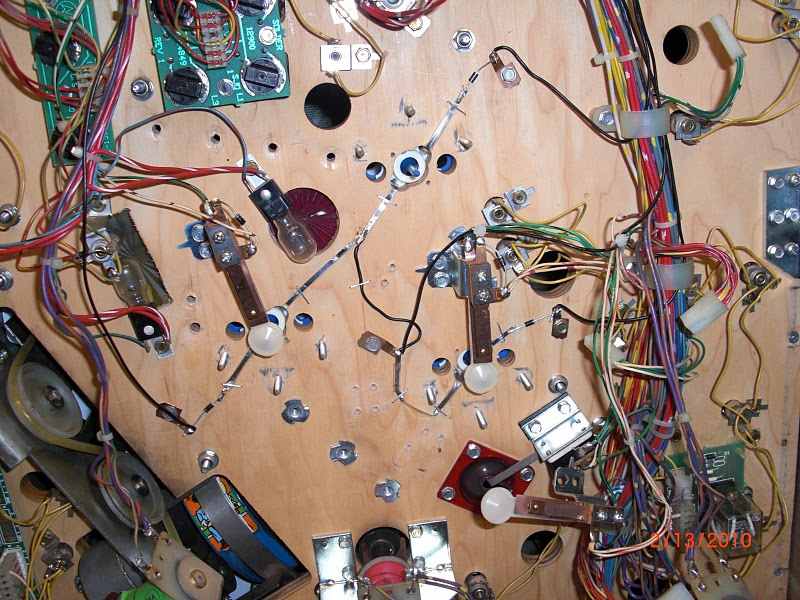
Wide shot of all three pops wired up.
During attract mode the lamps blink in an alternating pattern and sweep up and down in conjunction with the playfield lights. During game play, the lamps alternate in a clockwise motion similar to during attract mode.
So there you have it, an easy way to add back the pop bumper lamps in a Hurricane machine.
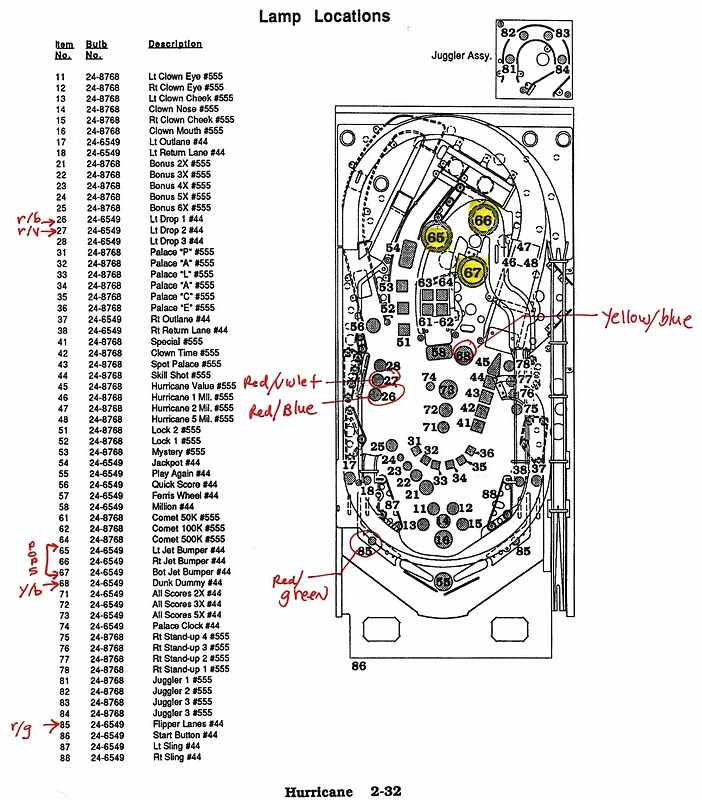
Hurricane lamp location chart.
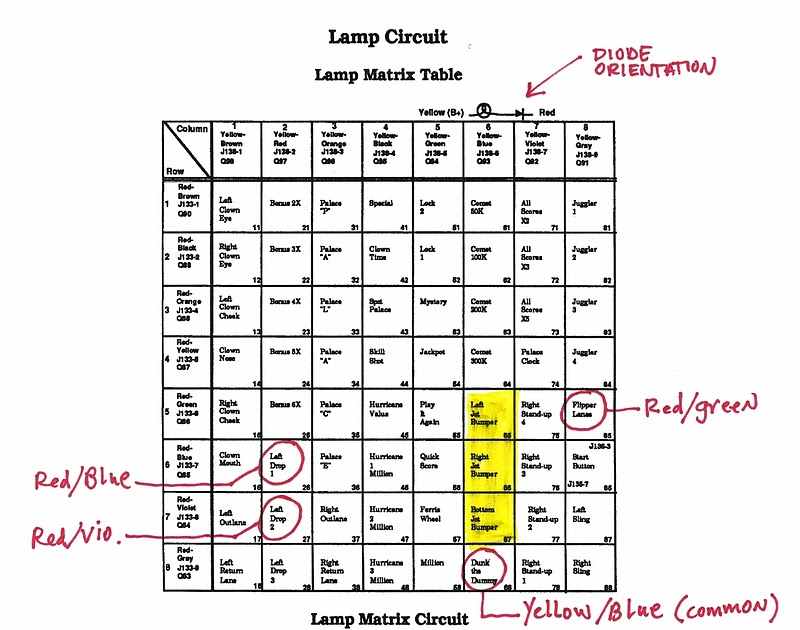
Hurricane lamp switch matrix chart.
Here's a video of the popbumpers hooked up.